Build your first Webex Connect Flow: A Step-by-Step Guide
August 1, 2024
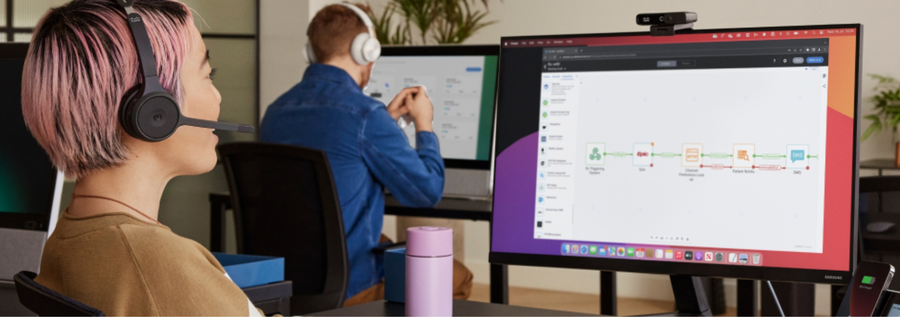
Webex Connect is a powerful Communications Platform as a Service (CPaaS) built to enable enterprises to automate digital interactions at scale. Developers can integrate channels such as SMS and WhatsApp, technologies such as AI and payments, and systems into applications.
In addition to its powerful API capabilities, Webex Connect helps developers to work quicker and smarter through the Flow Builder, which is used to build, configure, deploy, and iterate workflows that automate communication processes across the customer journey. By embracing the Flow Builder, developers can expedite the creation of communication-powered solutions for the business units they serve.
This blog will walk you through creating, configuring, testing, and troubleshooting your first Webex Connect flow using the Flow Builder.
Before we dive in, ensure you have the following:
- A Webex Connect account - you can create a Webex Connect Developer Sandbox account via the Webex CPaaS Developer Hub.
- An HTML5 capable web browser such as Firefox, Chrome, Safari, or Edge.
- Postman, an HTTP/REST API test client, for API interaction.
What We’ll Build
Our objective is to create a flow that notifies a patient of their appointment and allows them to respond via SMS. To do this, first, we need to access the Webex Connect Flow Builder.
Get started with the Flow Builder
Navigate to the Service Dashboard
At the highest level, Webex Connect lets you organize flows by projects called Services. Typically, these would be created for each of your application customer interactions and journeys.
For now, let's just access the auto-created default service:
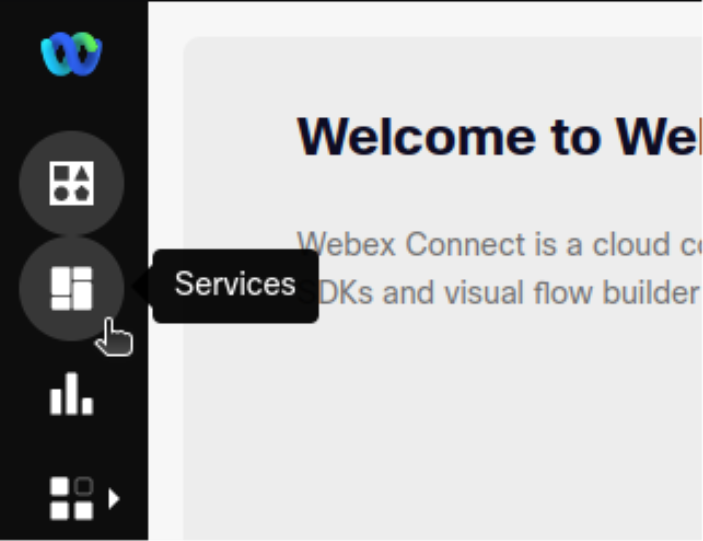
- From the left-side navigation bar, click on the Services icon:
- Choose the default "My First Service"
This should take you to the service Dashboard, which provides an overview of your service's activity and configuration, including analytics on recent traffic activity, access to the REST API docs/tools, and the Flow Builder itself.

Start Building a Flow
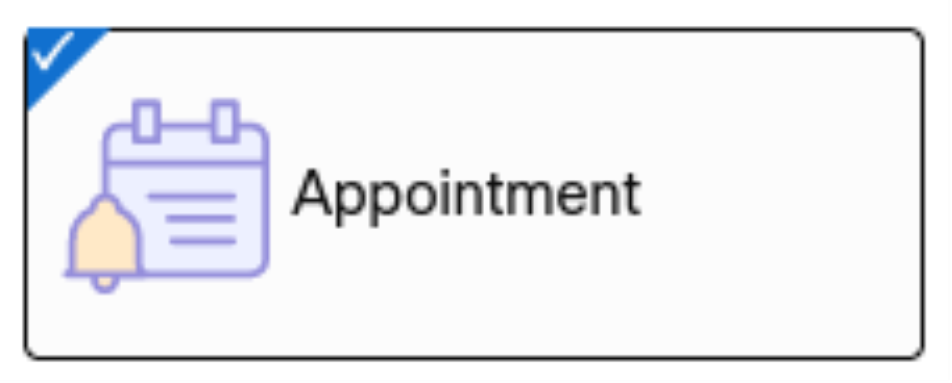
Select the Flows tab, then go ahead and click Create flow. Give the flow a name. For this lab, let's create our flow using the "Appointment" template:
 This will open up the Flow Builder, which will automatically open the Configure Webhook property page.
Our flow will be triggered by an incoming webhook - i.e., an
HTTP POSTwith some JSON-formatted initial data. You can view your flow's auto-generated webhook URL here: Webhooks are a very common way for applications to send events and data to each other; for example, a health clinic's patient system could send a batch of webhooks to this flow each day based on a query of all patients booked for appointments the next day.
Go ahead and give your webhook a name - can be anything, perhaps "Appointment Webhook"
Webhooks are a very common way for applications to send events and data to each other; for example, a health clinic's patient system could send a batch of webhooks to this flow each day based on a query of all patients booked for appointments the next day.
Go ahead and give your webhook a name - can be anything, perhaps "Appointment Webhook"The trigger webhook will need to deliver actionable data from an application to the flow, such as the recipients information. Define the expected JSON contents (just the keys) by pasting this sample webhook payload into the PROVIDE SAMPLE INPUT area:
{
  "Phone": "",
  "Name": "",
  "Appt": ""
}
Click PARSE. If the data is parsed correctly, it should look like this:
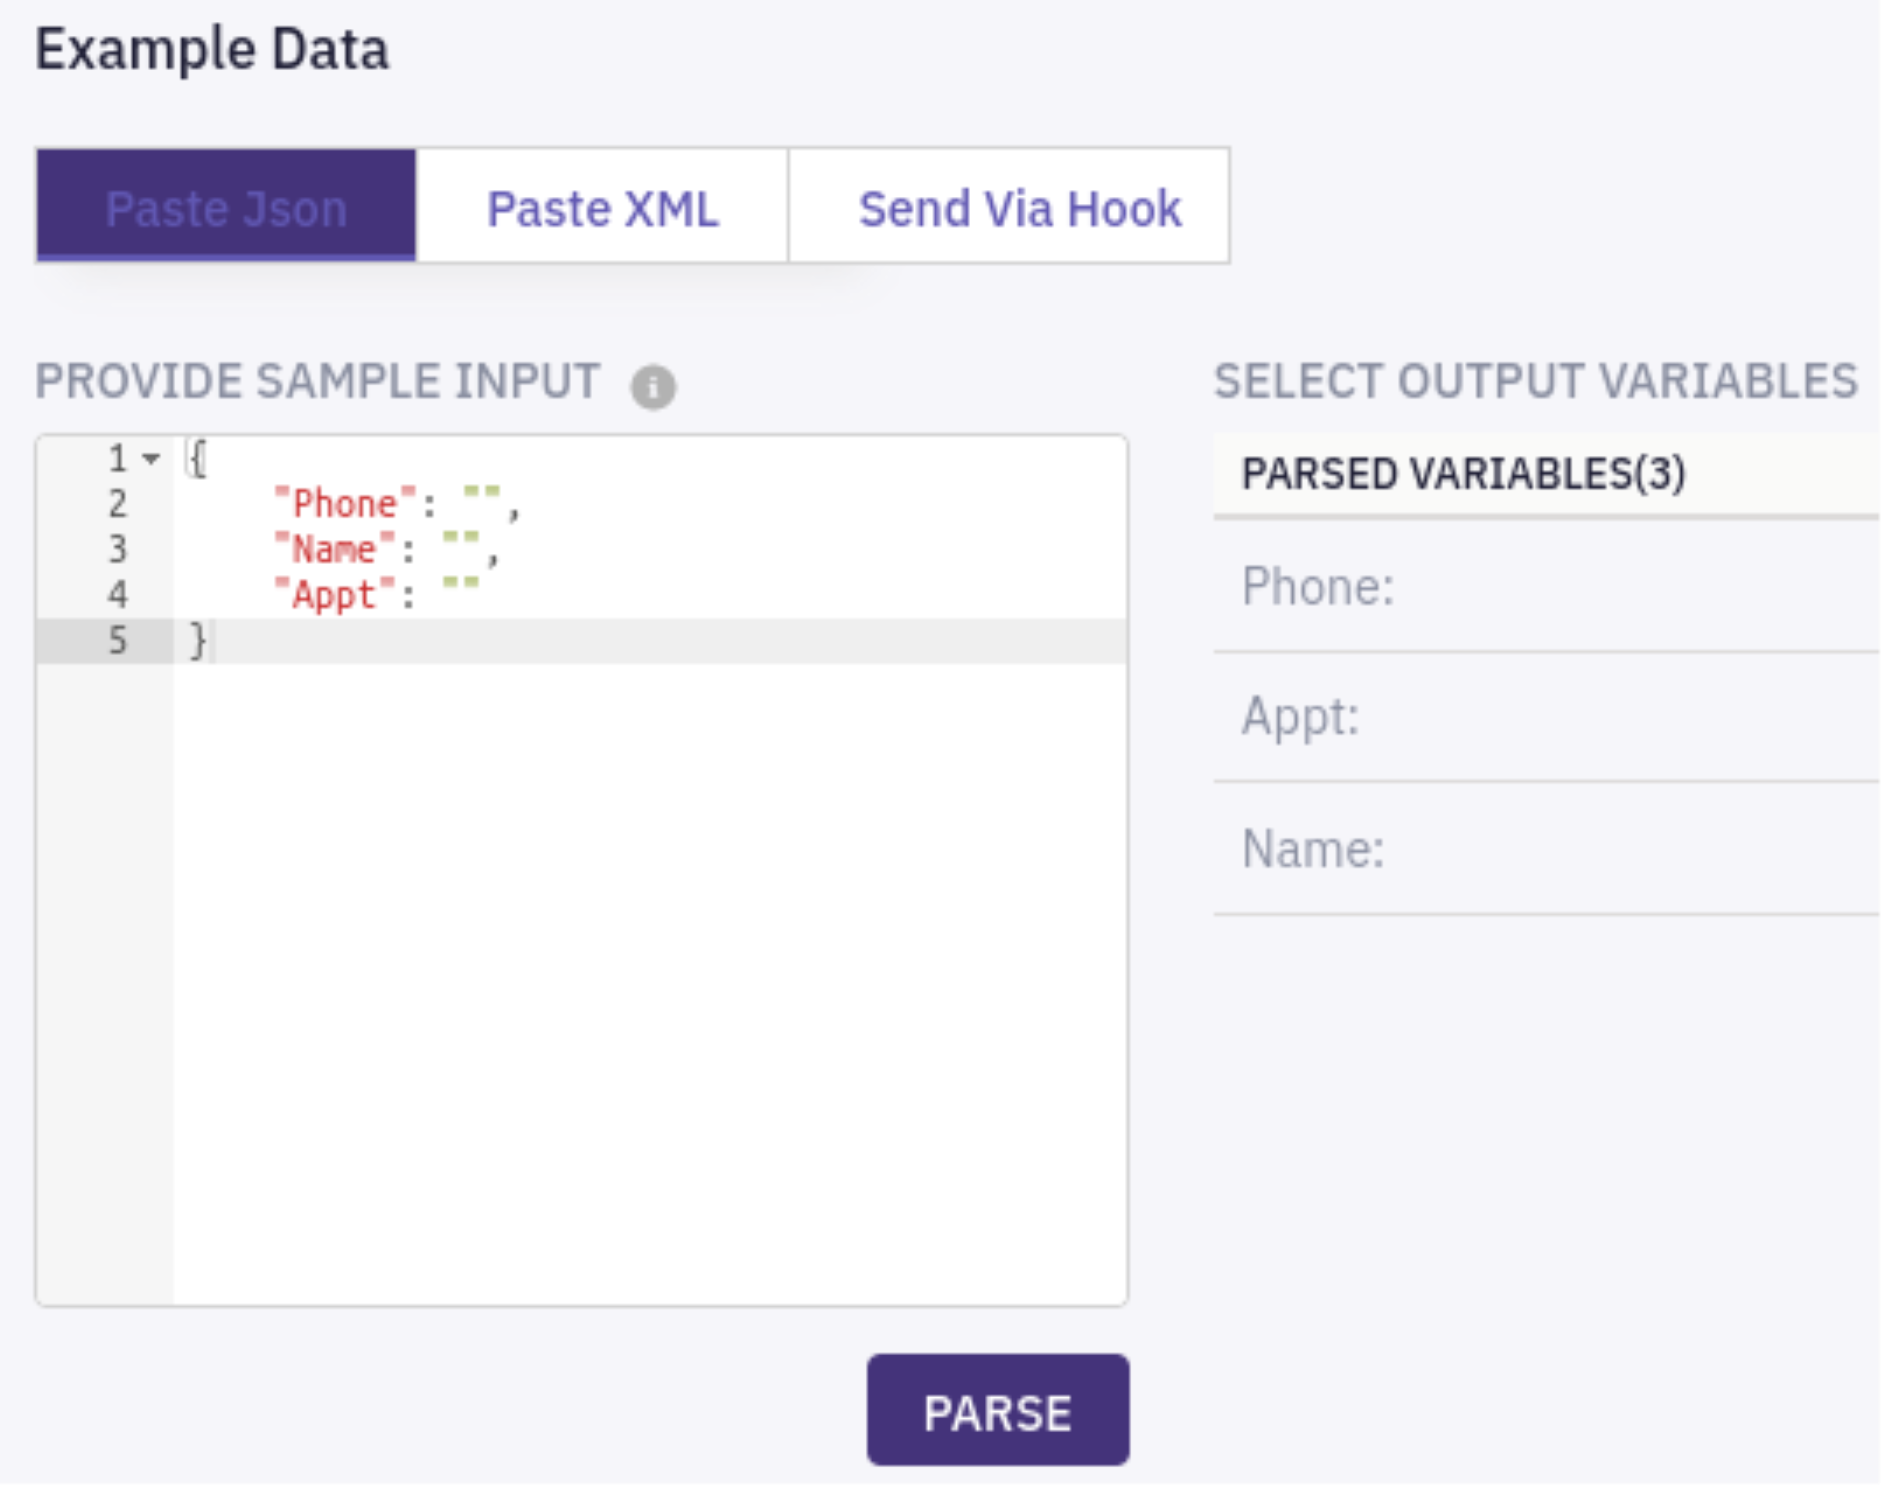
That's all the trigger configuration needed for now. Go ahead and click Save, which should bring you to the Flow Builder main screen.
You can see that a fairly complete flow has been automatically created, including event, data and logic nodes and logical interconnections needed to orchestrate them. The gist of what this flow does and how it works can be gleaned with just a quick inspection.
Feel free to play around in the Flow Builder for a bit: check out the Utilities/Channels/Integrations tabs, try out the bottom toolbar options, peek into some of the nodes (double-click), etc.
Note: If you make a change (e.g., dragging-dropping a new node onto the canvas) and can't manage to undo it (i.e., with Ctrl+Z), you can always delete the flow and recreate it from the template.
Send the Initial SMS
We've already configured the flow's triggering webhook (we'll learn how to test it a bit later), the next step in the sequence will be to send the initial notification SMS to the patient based on the webhook's data variables:
- Double-click on the Send SMS node to open it and view the configuration page.
- Delete the place-holder contents of the Destination field.
Replace it by opening the Start collection on the right side and clicking inboundWebhook.Phone:
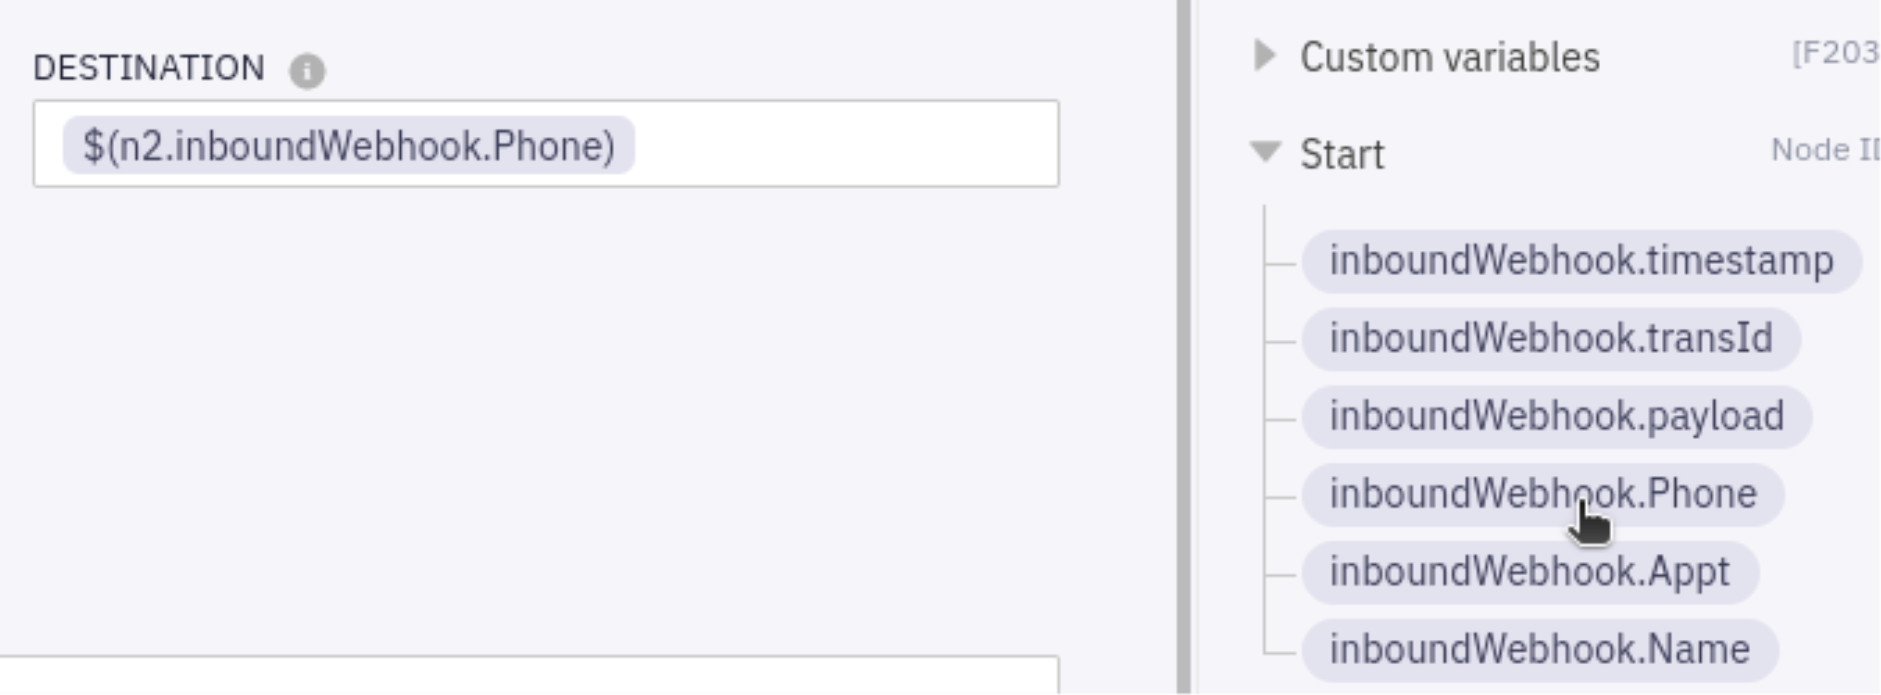
- In the FROM NUMBER field, select the (default, only) Sender ID:
 This is a phone number associated with your Webex Connect Service - i.e., the 'Caller ID' the patient will see for the SMS.
 - In the MESSAGE field, delete
$(name)and$(dateTime)from the message text, and replace withinboundWebhook.NameandinboundWebhook.Appt:
- You can now Save the configuration.
Receive the Patient Response
Once the initial reminder SMS has been sent to the patient, the flow will need to await the patient's response (if any!):
- Open the Receive node configuration.
- In the Receive SMS section, select the inbound NUMBER where we are expecting the patient's response to arrive (this would be the same number the initial SMS was sent from).
- Choose ***** for the KEYWORD.
- Replace the FROM NUMBER with inboundWebhook.Phone (under the Start variables), i.e., the patient's phone number.

The MAXTIMEOUT value of 600 means that the flow will wait a maximum of 600 seconds (10 minutes) for the patient's reply.
- Go ahead and Save.
Check the Response
Sending the initial response will have a number of results:
- The user replies with 'A' to keep the appointment.
- The user replies with 'B' to cancel the appointment.
- The user replies with something unexpected.
- The user never replies.
The Branch node can make if/then/else decisions about which branch of the flow to follow next:
- Open the "Check User Response" branch node config.
- We don't actually need to configure anything here (the template provided the current values), but by inspecting the Confirm and Cancel conditions, we can see that the node is checking if the received message content output variable from the previous receive node
($(n11.receive.message))"Equals" A or B.
A default "None of the Above" condition is also there too.
Report on Progress
As this flow could actually take a number of minutes to reach its final end point, it might be nice if we could monitor its progress.
This is possible by using the HTTP node type to send an outbound message to an external service – here’s a handy, free hook bin service: Webhook.site
In a real flow, the external service would be a reporting, analytics or dashboard application that would receive the notification + data, then update its state tracking on the appointment notification request. However, for our purposes, we'll just use the hook bin to accept the message so we can inspect the HTTP/JSON contents of the outbound webhook:
Open a new browser tab and navigate to: Webhook.site. (Feel free to use another hook/request bin.) It should display an auto-generated unique URL where webhooks can be directed:
 Copy this to your clipboard, and/or keep this tab open. Important: You must also select the option to enable CORS:

In the Flow Builder, open the top-most HTTP node (the one on the "Confirm" branch.)
Change the METHOD to POST.
Paste your hook bin's unique URL into the ENDPOINT URL field.
For the BODY we'll just relay all the data from the original triggering webhook, PLUS a Status: Confirmed field indicating how the interaction with the patient is proceeding:
{
  "Phone": "$(n2.inboundWebhook.Phone)",
  "Name": "$(n2.inboundWebhook.Name)",
  "Appt": "$(n2.inboundWebhook.Appt)",
  "Status": "Confirmed"
}
We're getting the run-time data values from the Start variables list on the right-hand side.
Open the Node Outcomes group in the lower right:
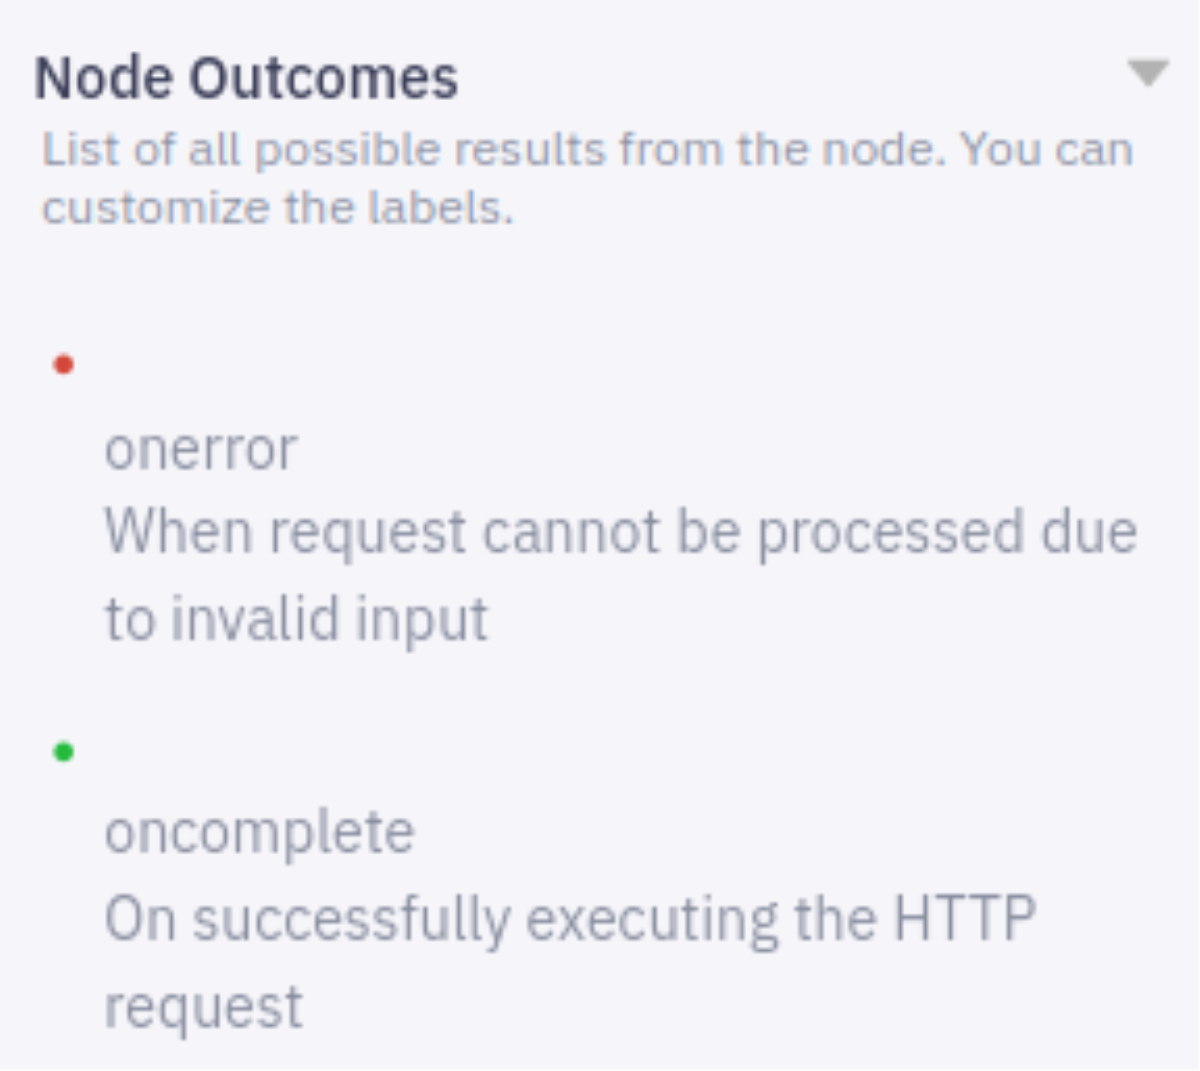 Notice that an HTTP node type has two defined outcomes:
 onerrorandoncomplete. This results in corresponding branches in the Flow Builder that will need to be handled (already in place from the template):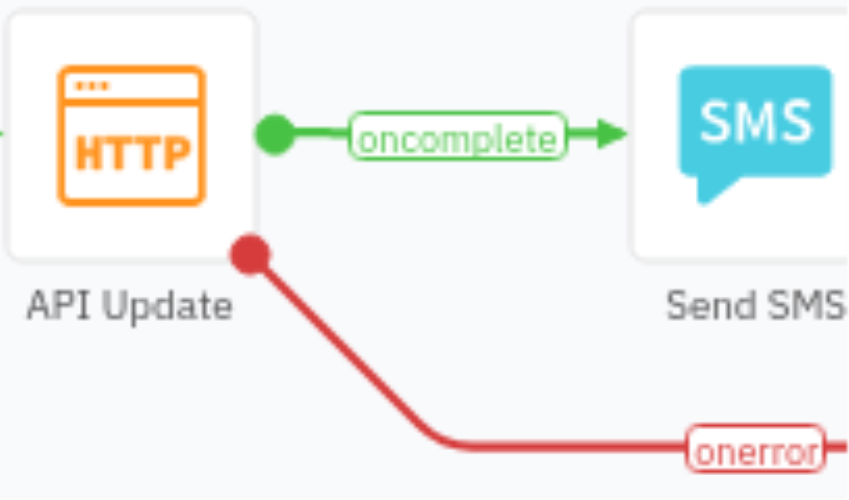
Go ahead and Save this node.
Repeat the steps above for the HTTP node on the Cancel branch, but this time sending
Status: Cancelled:{ "Phone": "$(n2.inboundWebhook.Phone)", "Name": "$(n2.inboundWebhook.Name)", "Appt": "$(n2.inboundWebhook.Appt)", "Status": "Cancelled" }
Final Configurations
The five remaining nodes that we haven't configured yet are all SMS nodes:
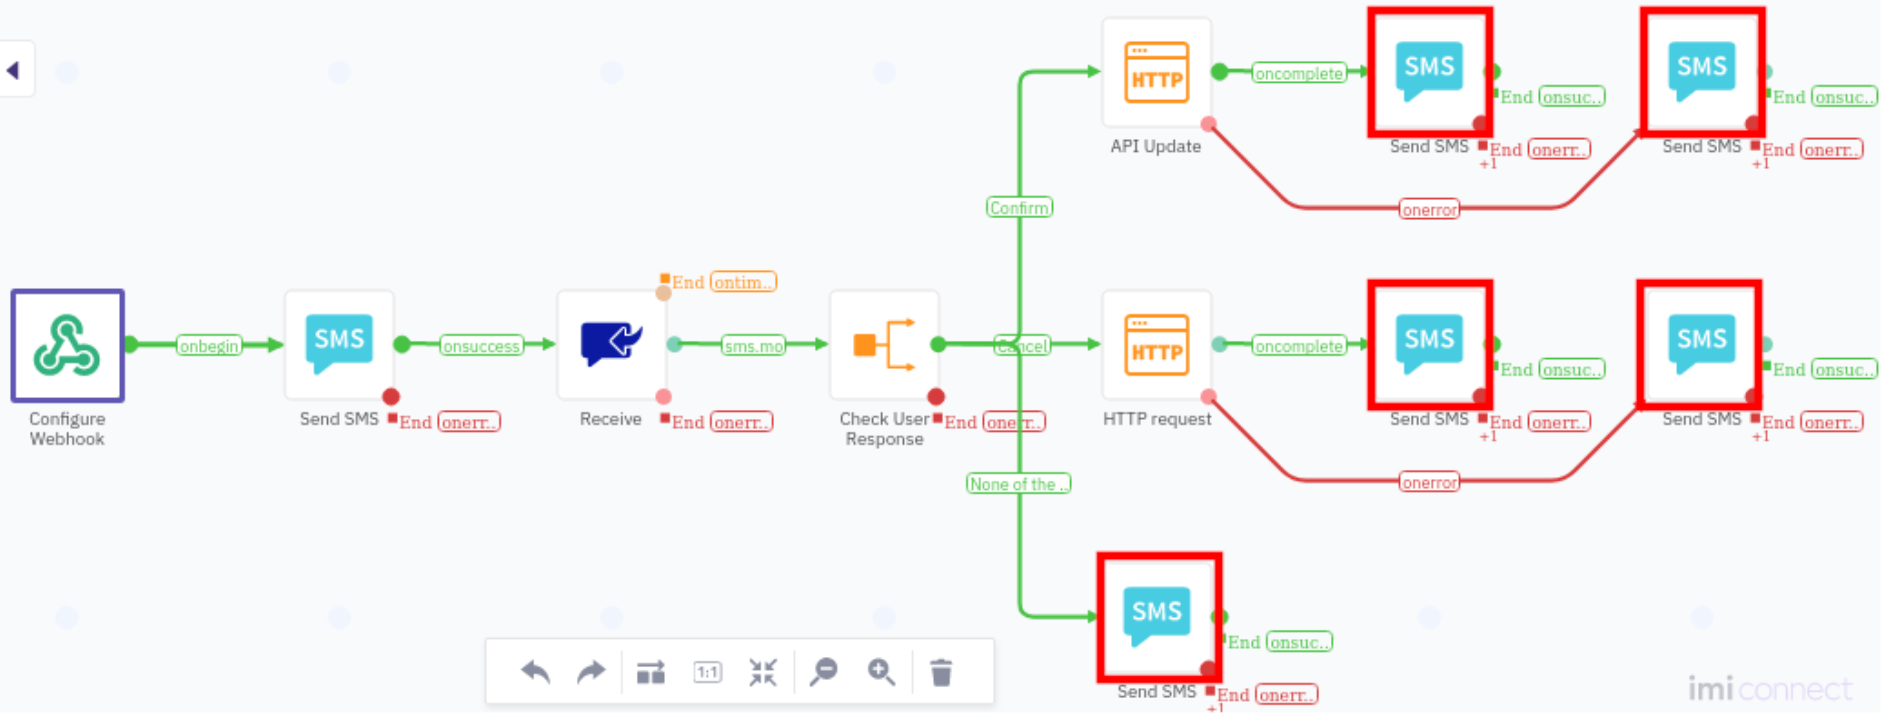
Configure all of these with the same DESTINATION and FROM NUMBER values as the initial SMS node:

Publish Live
The flow is complete and should now be ready to publish!
Since we're in dev/test mode, click on the Settings gear icon in the upper right. Under General / Advanced settings, enable Descriptive logs. This will give us detailed information about the inputs, outputs and any errors for each flow node, which will help greatly with any needed troubleshooting!
Once your flow is complete, tested and stable you will likely want to disable Descriptive logs to avoid having any sensitive enterprise or customer data written to the logs.
From the Flow Builder overview, click on Save in the top-right corner:
 During the save process, the system checks that the flow is valid and correctly configured. If there is a problem, you may see an error/warning message in the top-right:
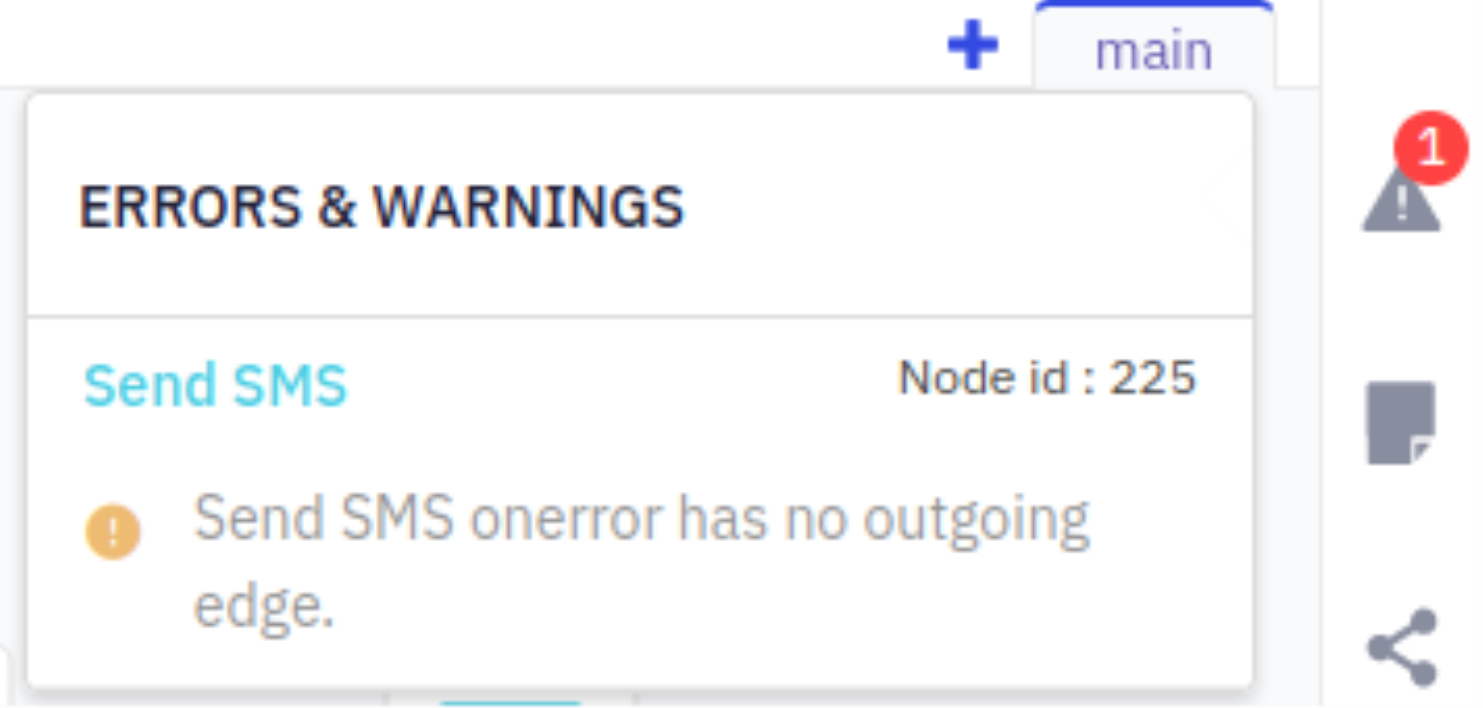 Clicking on the error will select the offending node, allowing you to correct its configuration and re-save.
Finally, click Make Live:
 Entering a comment is optional, but can be useful - e.g., for versioning.
Test the Flow
With the flow live and ready to interact with enterprise systems and patients/customers, it's time to give it a test run!
If you recall, the first thing we did after creating the flow was to configure the triggering inbound Webhook:
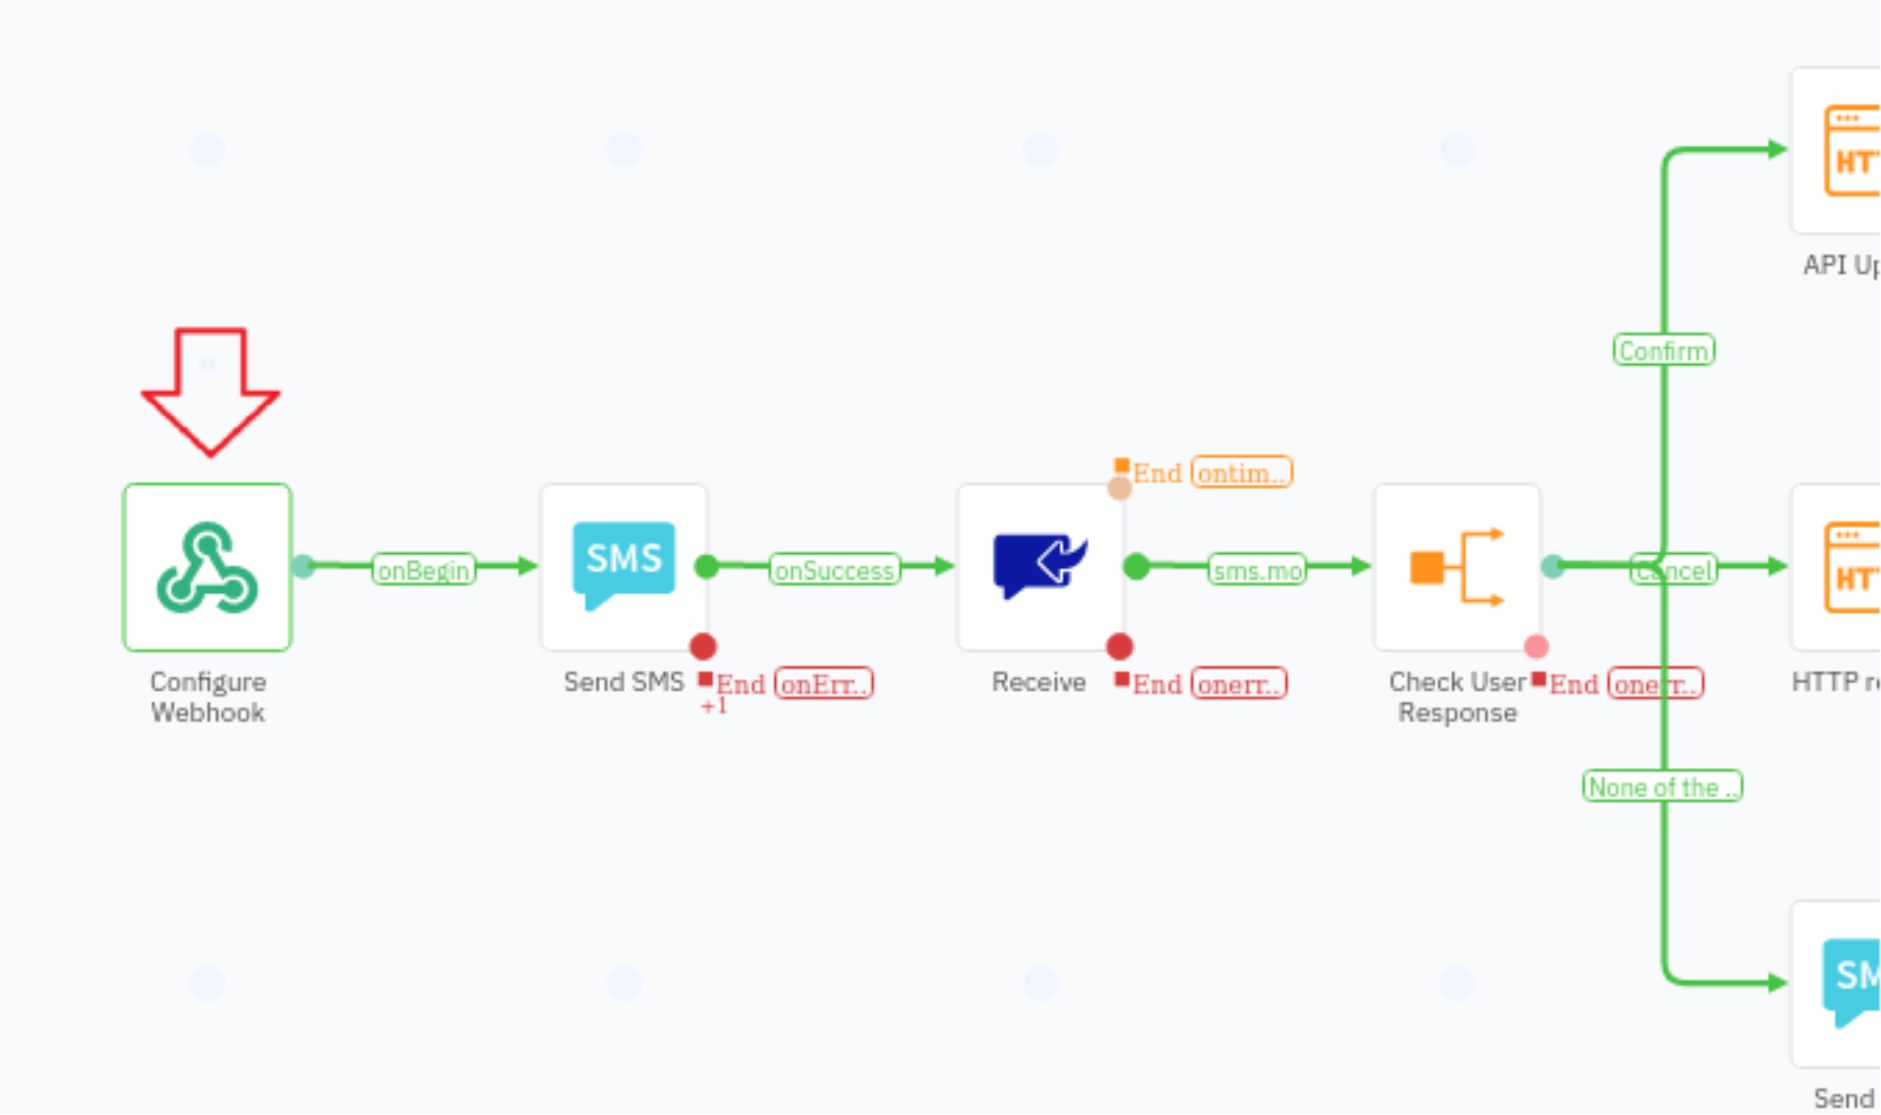
Since we don't have an actual enterprise back-end system programmed to send a real webhook, we need a way to send the webhook message ourselves, for this we will use Postman.
You can also use Curl from the terminal, or almost any other HTTP tool to make the webhook HTTP POST.
Let's configure and send the HTTP POST request needed to trigger our flow:
Open Postman, and click the "+" button to create a new request.
Select POST from the method dropdown.
In the URL field, paste in your triggering webook's URL. You can retrieve this by going back to the Flow Builder by double-clicking the trigger Webhooknode and grabbing the WEBHOOK URL:

Select the Body tab. Choose raw type, and then JSON format from the dropdown.
For the request body itself, copy the sample input JSON BODY from your trigger Webhook node and paste, inserting some test data (you can use your mobile number for Phone, being sure to include the country code but not a "+", e.g "1" for the US or 44 for the UK):
{
  "Phone": "14055551212",
  "Name": "Jane Doe",
  "Appt": "March 4, 2022"
}
The final request should look like this:
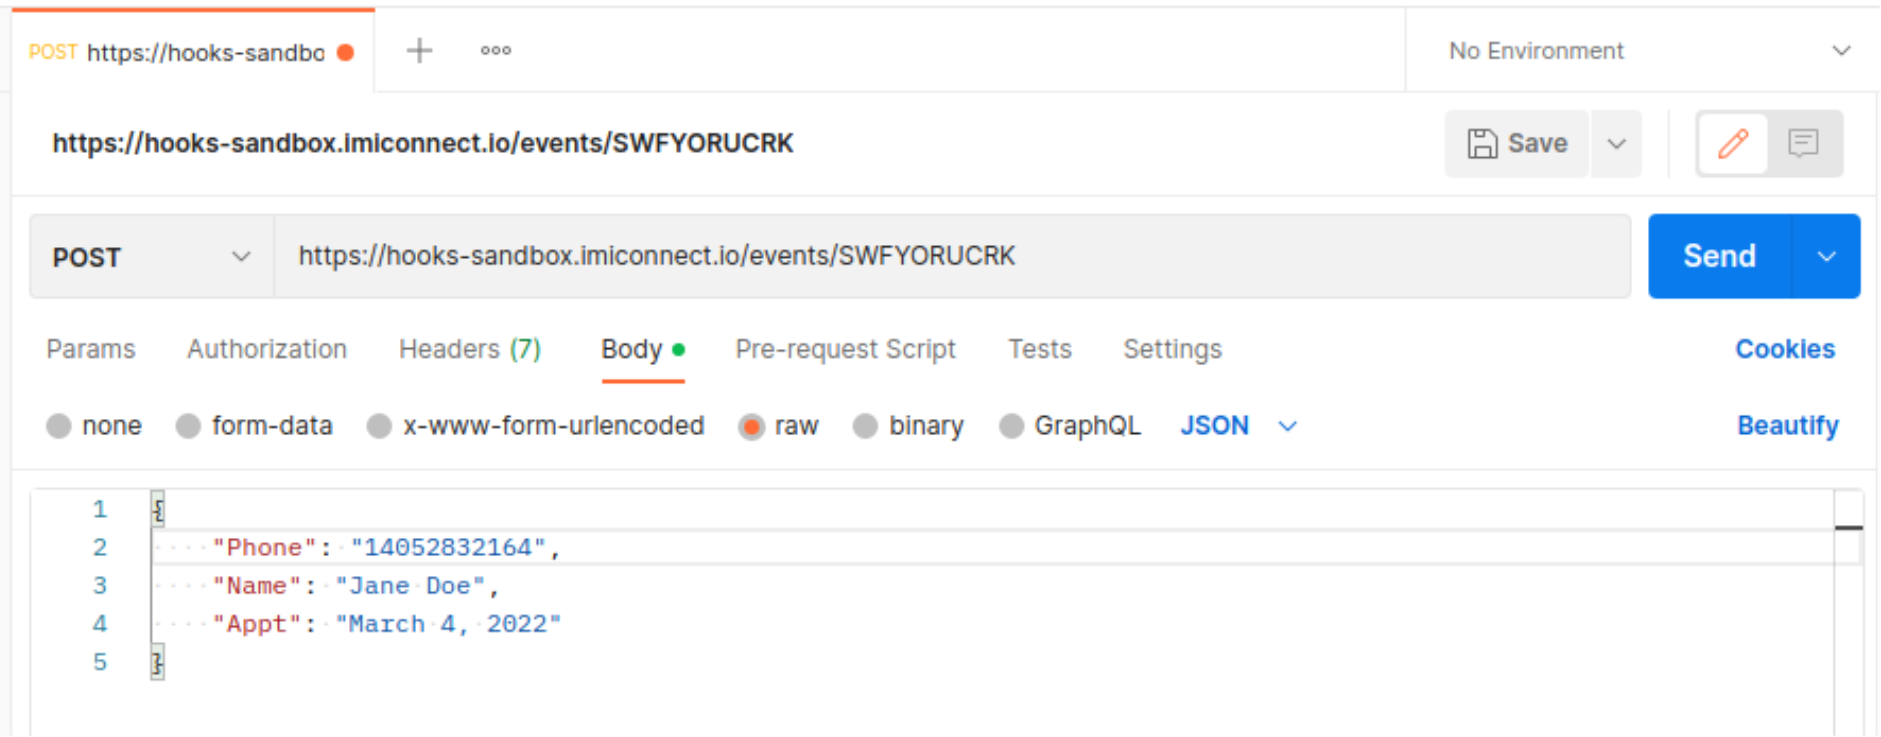
Now you can click Send to fire off the webhook.
Verifying and Troubleshooting
If all went well, a number of things should happen:
- You should receive an appointment reminder SMS on your mobile phone.
- Replying with "A" or "B" should result in the appropriate acknowledgement SMS message.
- After the patient reply step, checking your hook bin web page you should see an HTTP POST message has arrived, containing the JSON "progress" message configured in the flow's HTTP node.
- If after sending the webhook something unexpected happens (including nothing!), you can click on the Debug "bug" icon to examine the logs and drill into specific node operations for errors and clues:

Congratulations and Next Steps!
Congratulations on completing your first Webex Connect flow!
Hopefully this walkthrough has showcased how the Flow Builder enables enterprise developers to work in a more efficient way to accelerate IT roadmaps and better meet the needs of their organizations.
This is just the beginning—continue exploring additional templates, channels, nodes, use cases, and API capabilities. Consider requesting full access to unlock more enterprise features and even book a demo to deepen your understanding of Webex Connect.
In this blog, we not only introduced you to the basics of Webex Connect but also equipped you with the knowledge to build more complex flows and integrations.
For more Developer Resources, you can visit the Webex CPaaS Developer Hub.