Building the Vivoh OnTime for Webex App
July 26, 2022

Vivoh offers an ultra secure DVR for online meetings hosted by financial institutions. As our customers have the highest bar for security requirements, so do we, and this post shares why we used Webex to build our OnTime application with those security considerations in mind. OnTime utilizes Webex OAuth and Webex RTMPS streams to provide an ultra-secure video delivery system perfect for financial institutions.
No Code is the Most Secure Code
The best security solution is the simplest solution. A hidden corollary to this fact is that the less code your system requires to provide your security features, the safer your system is, and the lower your total cost of maintenance and ownership is. To validate the set of video resources a user has access to, OnTime needs to definitively identify a user. The Webex OAuth flow allows us to delegate the identification of the user to Webex. This means OnTime has no database of users to maintain and protect from attackers. OnTime has no code that facilitates resetting passwords. In whole, we have almost zero custom code preventing attackers: we rely on standard authentication libraries and standards like JWT to secure our users. These technologies have long and proven track records for securing credentials and claims useful between client and server applications. Removing as much custom code to manage these credentials makes our attack surface much smaller and makes auditing our code much easier.
Five Minutes to a Secure Identity Management via Webex OAuth
Integrating with the Webex OAuth backend was simple. You create a Webex OAuth application. This requires configuration of redirect URIs and scopes. You are then provided with a set of credentials that are used by your application to verify an identity token provided by Webex after the identity flow has finished. This blog post documents the steps to create this OAuth application with Webex.
Step 1: Creating the Webex OAuth Application
To create an OAuth application, you need to login to the developer console of Webex. Then, select create a new app.
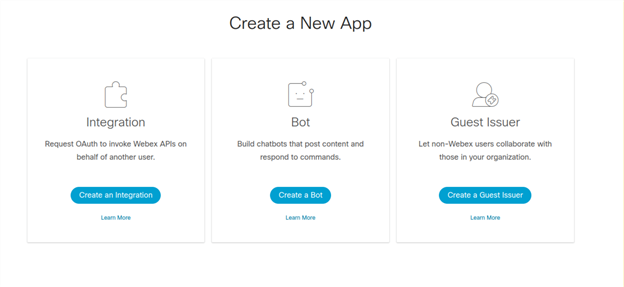
Choose “integration” (with the subtitle request OAuth to invoke Webex APIs on behalf of another user). You will then be presented with a screen where you enter information about your application, including name, icon, description, and other pieces of information.
Step 2: Configure Redirect URIs
To use an OAuth flow, you will need to have a place where your users will go after authenticating. This is termed the redirect URIs: you can have one, but often want to create multiple URIs so you can test against a staging or development environment. The standard flow for OAuth is that the provider will authenticate the user, and then send the user to your Redirect URI with a token. That Redirect URI endpoint should handle that token and verify it against Webex to prove its validity and do whatever is necessary to take next steps for your application. In the case of OnTime, Vivoh takes this token, validates it with Webex to see that this is indeed a token identifying the user, and then generates two JWTs tokens: one, with that user identity and the other with information specific to OnTime. OnTime uses that JWT token for each request to validate that the user is who they say they are and that they have access to the resources they are requesting. Once we have secured the identity that Webex provides to us, we do not have to involve Webex any further until the JWT token expires.
Step 3: Configure OAuth Scopes
OAuth applications provide a token that permits access to Webex. In our case, we only need to use that to retrieve the identity of the user one time when generating the JWT token. Depending on the needs of the application, you can provide a variety of scopes for that token, which permit access to specific parts of the Webex API. For example, if your OAuth application wants access to the meetings information in a read-only way, then you would select the meeting:schedules_read scope.
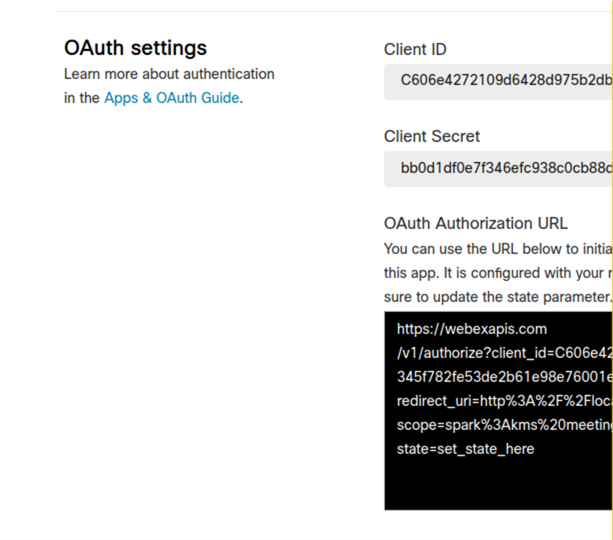
Step 4: Understanding Client ID and Client Secret
Once you have entered in the Redirect URI and scopes, you can create your OAuth application. An OAuth application will provide you with a client ID and secret. These are secrets that are managed generally behind your Redirect URI: when the redirect URI endpoint receives a redirect after authentication+identification, that redirect URL will include a token. The client ID and secret are used to exchange the token against Webex. Webex will return an access token which can be used to access information in the Webex API on behalf of the user that authenticated in the prior step. OnTime uses the Webex API to retrieve the user email address, however we never store this information. We then generate a JWT token for that user and send that back to the user where it is stored in their browser and passed back and forth between requests of the OnTime application to validate video packets.
Step 5: The User Journey Through Webex OAuth
Once you have created your Webex OAuth application, you can start having users authenticate against it. Typically, you are only permitted to authenticate with users who are in your organization; this prevents unapproved users from accessing your application before you are ready for them.
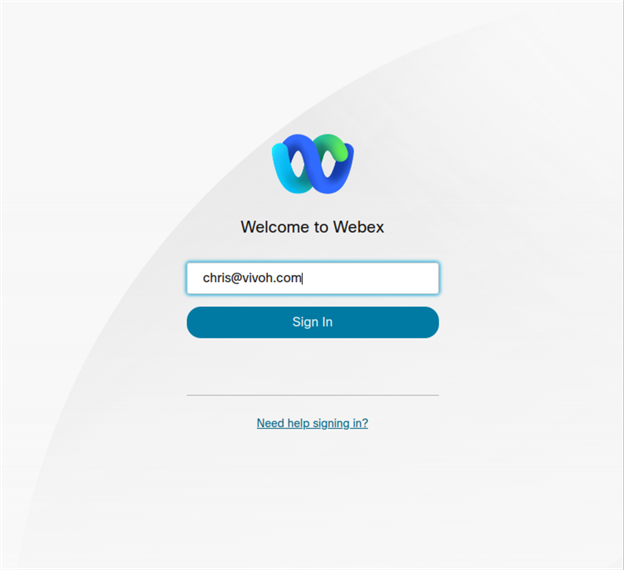
To authenticate, your users will generally start on your application, and then be redirected to a Webex URL that starts the authentication flow and includes a reference to one of the Redirect URIs (which you configured in Step 2). Webex will send the user to a URI which will verify their login status; if the user is already authenticated, the user will proceed to the next step without being asked for credentials. If the user is not authenticated, then the user will be asked to login. In some cases, Webex might determine that this user will need to be re-authenticated based on a decision made by Webex given the IP from which they are accessing it, the browser user agent, or a whole host of other information that can be used to determine whether this particular login requires additional security measures to assure the user is who they say they are. All of this is handled by Webex, and importantly for Vivoh OnTime, is an opaque process that protects the integrity of the user profile when it reaches us but does not require any alteration to our code. For example, if the original login happened inside a trusted corporate network, and then the same user attempted to authenticate when at a public internet access point in a cafe, Webex could decide that the second login requires more scrutiny. Keeping this complexity outside of the Vivoh OnTime application means our codebase is smaller and more secure, while still benefiting from the plethora of security features Webex OAuth provides us.
Once Webex has authenticated the user, the user will be presented with a screen asking them to accept the OAuth application and display the permissions (referred to as “scopes” in OAuth) that this application will require to operate. For Vivoh OnTime, we ask for user information (specifically just email address) so our application requests the spark:read_user scope (again, we never store this information). If your application requires different information about the user that authenticates, you can adjust the scopes. If the user accepts the permissions the application requests, then they proceed to the next step, which will take the user back to your application.
Step 6: User Journey Post-Webex
Once Webex has authenticated the user, the user is then redirected back to your application, specifically to the redirect URI you provided when you initiated the Webex authentication flow. At that point, Webex provides you with a token. This token needs to be exchanged on the server side of your application for an access token. The token is exchanged by hitting an API at Webex, an API that can only be accessed with a client ID and secret (which were obtained after creating the OAuth application in Step 4). If the client ID and secret are valid, and the token from Webex is valid, then Webex will provide an access token. This access token can be used to access the Webex API and retrieve data about that user. If your application needs information beyond the user information, then you will need to adjust the scopes for your Webex OAuth.
For Vivoh OnTime, we accept the token from the user after they are returned from Webex OAuth. Vivoh OnTime uses this to retrieve one piece of information: the user email. In our case, the scopes we request of the user only permit us to ask for this information of Webex; if we had asked for a list of meetings the user had access to, Webex would decline that information because the scope we asked of the user during the authentication flow did not indicate we would be asking for that information. Vivoh OnTime then uses that validated user information (in the form of an email address) combined with other situational information determined now of authentication to create several JWT tokens which the user passes back and forth as a HTTP cookie. Those JWT tokens use digital signatures managed inside the Vivoh OnTime server application to provide secure credentialing for our users. When a user sends us back a JWT token, we know that their identity is secure.
Step 7: Adding Video via Webex RTMPS Streams
Any Webex webinar can be configured to distribute live video via RTMPS to a remote service. When a webinar is augmented with Vivoh OnTime DVR functionality, the webinar presenter simply needs to add a remote RTMPS source to their webinar. Video is then converted and streamed by Vivoh OnTime and provided only to authorized users via the Webex OAuth flow. Each video packet is authenticated and authorized using the JWT tokens which were generated in the authentication flow.
Live streaming must be enabled in your Webex Meetings or Events account according to these instructions. Events version WBS40.2 and later is required.
To live stream, you need to configure Webex to broadcast to a destination. Vivoh OnTime is one such destination and enables DVR functionality inside your webinar (to use Vivoh OnTime a subscription is required; contact sales@vivoh.com.
Your streaming service will provide you with a target stream link (RTMPS URL) and a stream key. These two pieces of information are enough to configure the broadcast endpoint. Often the RTMPS (ingress) URL is different from the (egress) URL you will give your viewers; with Vivoh OnTime we provide you with an ingress URL and a stream ID (which is different from the stream key and adds a security layer so you don’t reveal your stream key to participants).
When you have configured your remote stream, you are ready to start broadcasting. Start your Webex Meeting, then click: "Start Live Streaming" and enter the provided Streaming service name, Target stream link, and Target stream key values. If you are using OnTime, these will be OnTime, rtmps://CUSTOMER_NAME.vivoh.com:443/live and then a stream key like xxx123.
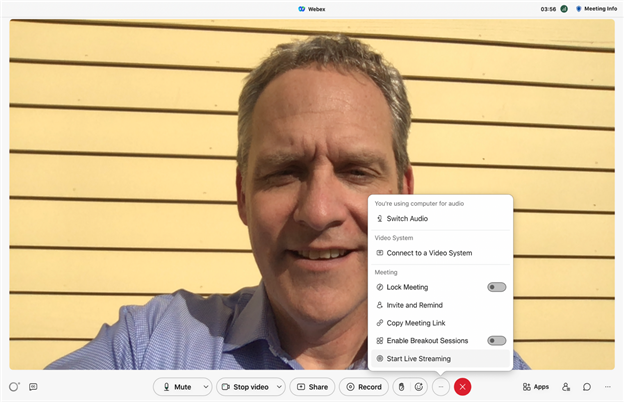
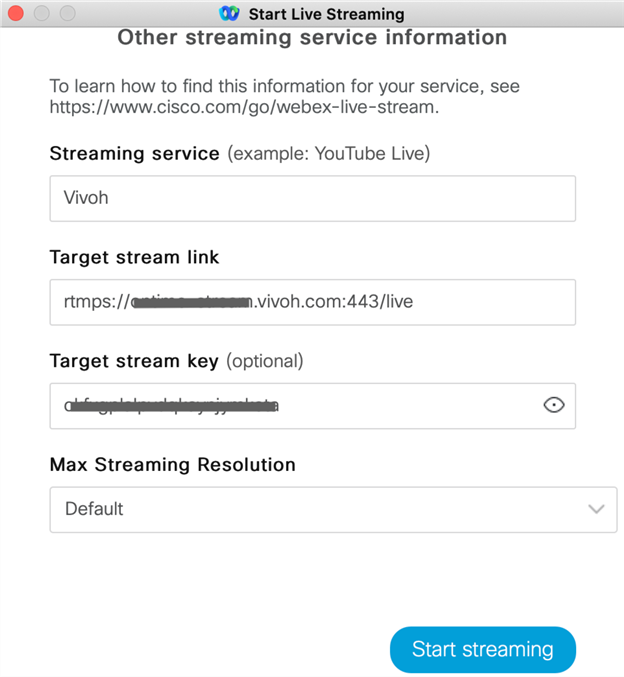
Once Webex is configured, you can click: "Start streaming" to initiate the stream. The live video will be pushed from Webex to the streaming service. OnTime accepts this video and provides a DVR service.
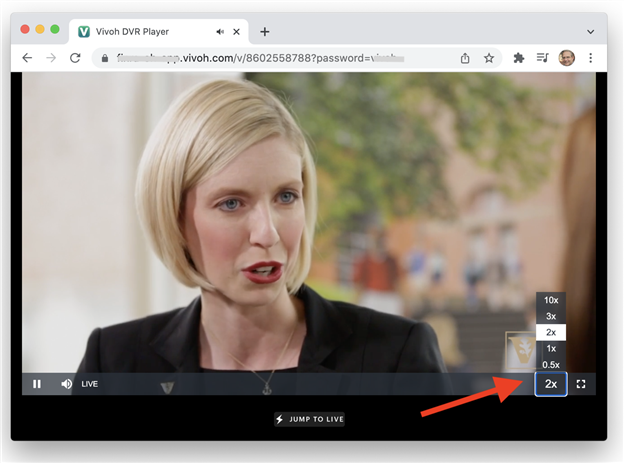
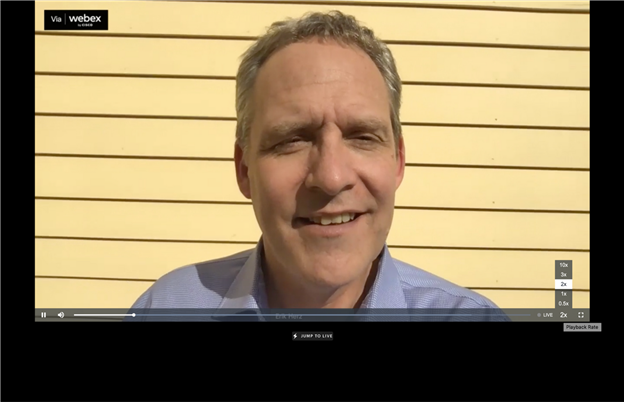
If your streaming service permits viewing of the live video, then you will have a view URL. With OnTime this URL will look something like: https://webex-ontime.vivoh.com/v/customer-01. Notice how the ingress stream key in our example 111xxx is different from the stream ID, which is customer-01 in this example. If you are using Vivoh OnTime, that video feed is converted into a DVR experience where attendees will then be able to rewind the live Webex meeting, pause it, or play it back at 2X speed. And, at any time, they can click "Jump To Live" and re-join the live Webex meeting in progress.
Conclusion
In this article, we walked through the steps to wire together Webex OAuth and Webex RTMPS live streaming to create a full-featured Webex app integration.
Feel free to connect with us and share your experience at engineering@vivoh.com. For more behind-the-scenes systems, processes, and techniques that power Vivoh OnTime, check out our blog.