Contact Center Flow Designer: Integrating Third-Party APIs with the HTTP Integration Connector
May 13, 2024

There is a lot going on under the hood of most contact center technology stacks during day-to-day operations. A contact center agent serves hundreds of customers daily and handles a lot of sensitive data. A customer’s time and experience are extremely valuable and can make or break potential revenue for any organization. Though speaking to a representative is still the top preferred engagement channel for customers, there are still ways that developers can build applications and services that make digital-first experiences. These experiences can build the confidence of an agent to handle sensitive data, are comfortable for agents to use, and can streamline the “Zero to Hello Agent” time for customers with important support needs. The Webex Contact Center Flow Designer is an integration surface that provides development teams with the tools necessary to plug in third-party APIs for congruent technologies to run alongside Webex Contact Center call handling and routing strategy software.
Pre-requisites For Setting Up a Flow Designer Connector
Best practices ask a developer’s third-party API to either be set up with a path for an integration to be registered To ensure a smooth integration process within the Flow Designer, it is recommended that developers prepare their third-party API to support one of two authentication methods:
- OAuth Authentication: Ideally, the third-party API should have a dedicated endpoint that allows for the registration of the integration on your platform. This endpoint should facilitate an OAuth authentication flow, enabling users to securely connect their third-party services with the Webex Contact Center.
- Basic Authentication: Alternatively, the API can provide a Basic Authentication method, which requires a username and password for access.
Once the third-party API is ready to support one of these authentication methods, the Webex Contact Center Administrator can then proceed to configure the integration connector by following the provided setup instructions. This involves accessing the necessary authorization credentials and applying them within the Flow Designer to establish the connection.
Setting Up Third-Party API Custom Connectors in Control Hub
To set up a third-party connector in Control Hub:
- An organization administrator should log into Control Hub at https://admin.webex.com.
- Navigate to Services > Contact Center > Tenant Settings > Integrations > Connectors.
- On the Custom Connectors Card click Set Up or Add more
- In the Name field, enter a relevant name for the connector that a user can associate with the service when discovered in the Flow Designer HTTPS node setup.
- Choose an authentication type from the Authentication Type drop-down (OAuth or Basic Auth).
- In the Resource Domain URL field, enter the URL of the third-party service API (HTTPS Required).
- If your API uses OAuth 2.0, choose either Client Credentials or Password Grant Types:
- In the Client ID field, enter the third-party API service client ID issued for the integration.
- In the Client Secret field, enter the Client Secret.
- In the Token URL field, enter the token URL of the authorization server.
- In the Scope field, enter the scope for the client credentials grant.
- If your API uses basic auth and the grant type is password grant:
- In the Username field, enter the username of the service account.
- In the Password field, enter the password of the service account.
- In the Validation URL field, enter the URL to validate the username and password.
- Click Done > Close.
Discovering The Connector in the Webex Contact Center Flow Designer
Now that the connector is set up, Webex Contact Center customers can leverage your software from the Flow designer.
To access the connector in your sandbox org:
Login to the Webex Control Hub at https://admin.webex.com/login.
Go to Service > Contact Center > Customer Experience > Flows and either select an existing flow or create a new flow.
When in the Flow Designer application make sure that the Edit option is toggled on.
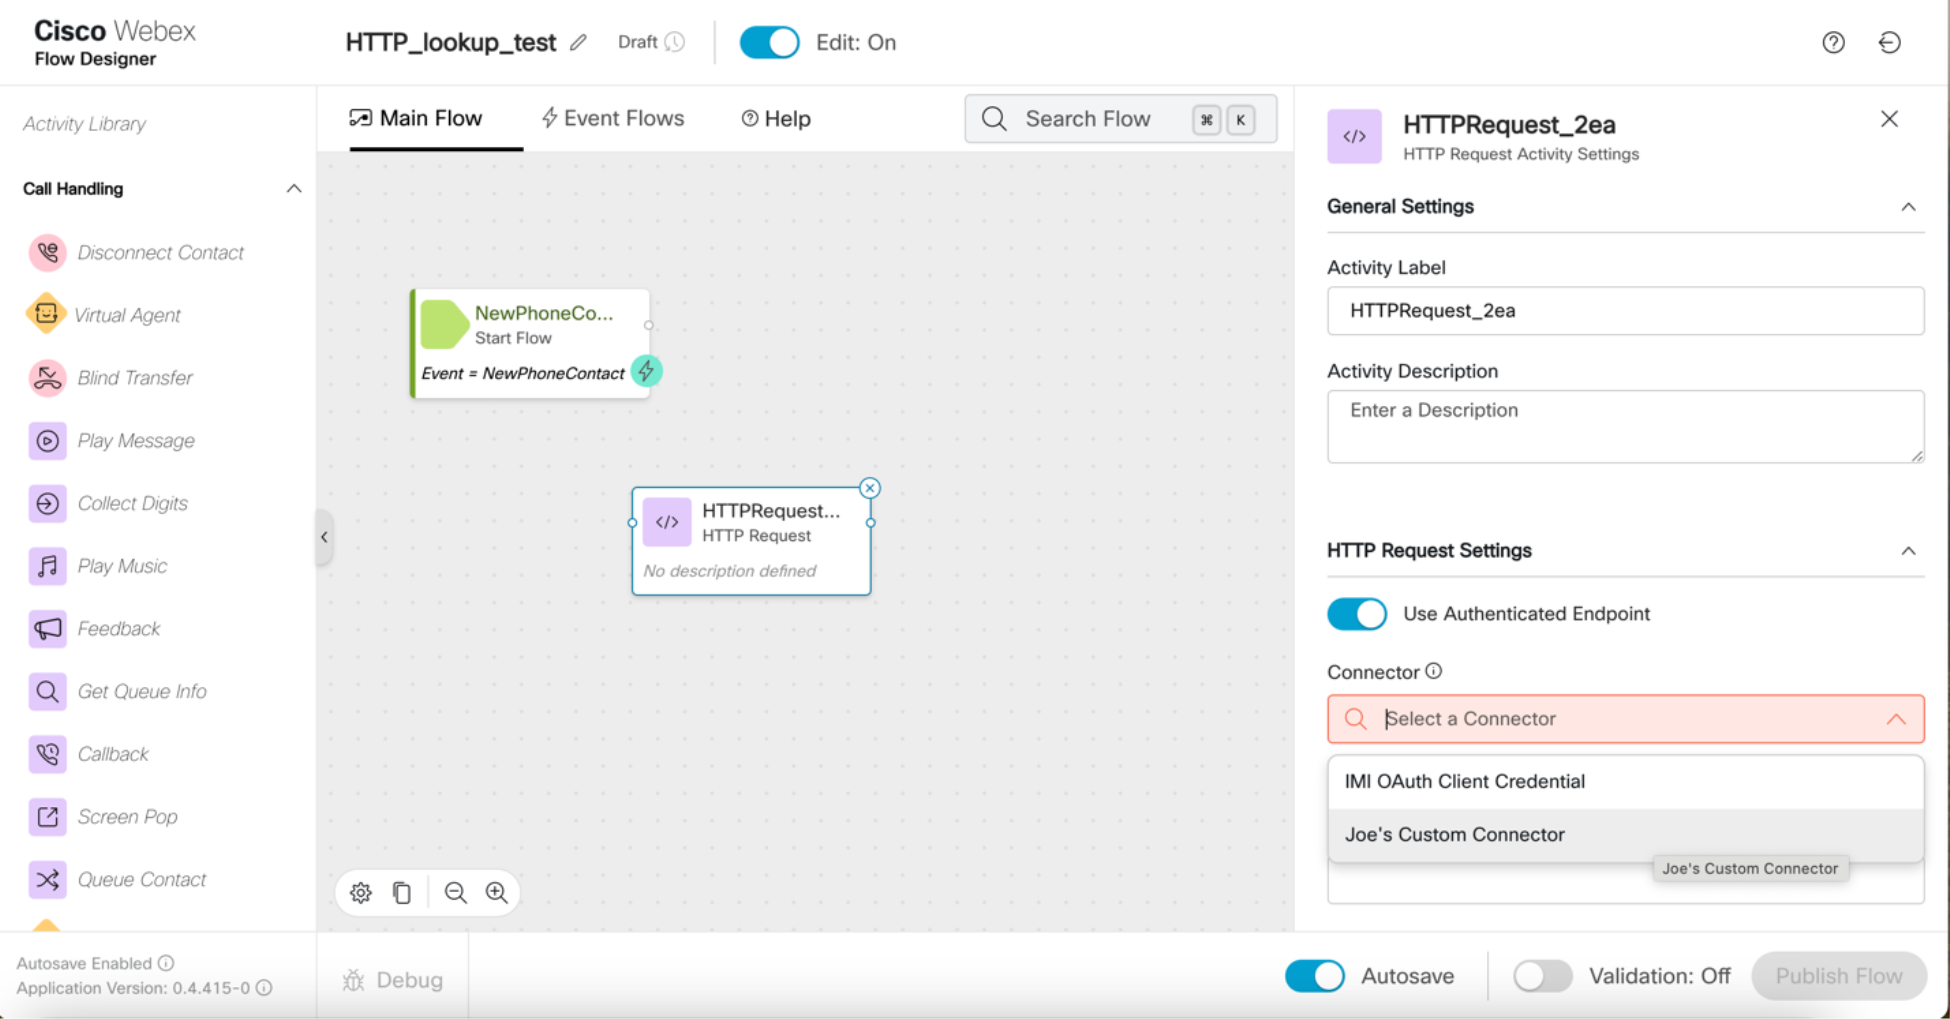
From the Activity Library in the left navigation pane, select an HTTP request node from the Flow Control section of the options.
Click on the node in the Flow Builder, and under HTTP Request Settings, toggle on Use Authenticated Endpoint.
On the Connector drop-down, the custom connector you just created should be available to use:

Need Some Help? We Got You Covered!
We are excited to provide you with support for these features. If you need help, the Webex Developer Support Team is standing by and happy to assist. You can also start or join a conversation on the Webex for Developers Community Forum.
