Experimenting with Webhooks
Experimenting with Webhooks
Webhooks allow your app to be notified via HTTP when a specific event occurs in Webex. An event could be triggered by a message being posted to a space, or a user joining or leaving a space, or a meeting that started or stopped. Events trigger in near real-time allowing your app and backend IT systems to stay in sync with new content and room activity.
You can think of webhooks as "reverse APIs" where the Webex cloud platform posts data to your application (instead of the other way around.) For example, you can register a webhook so that your application receives a notification every time a new message is posted in a particular Webex space.
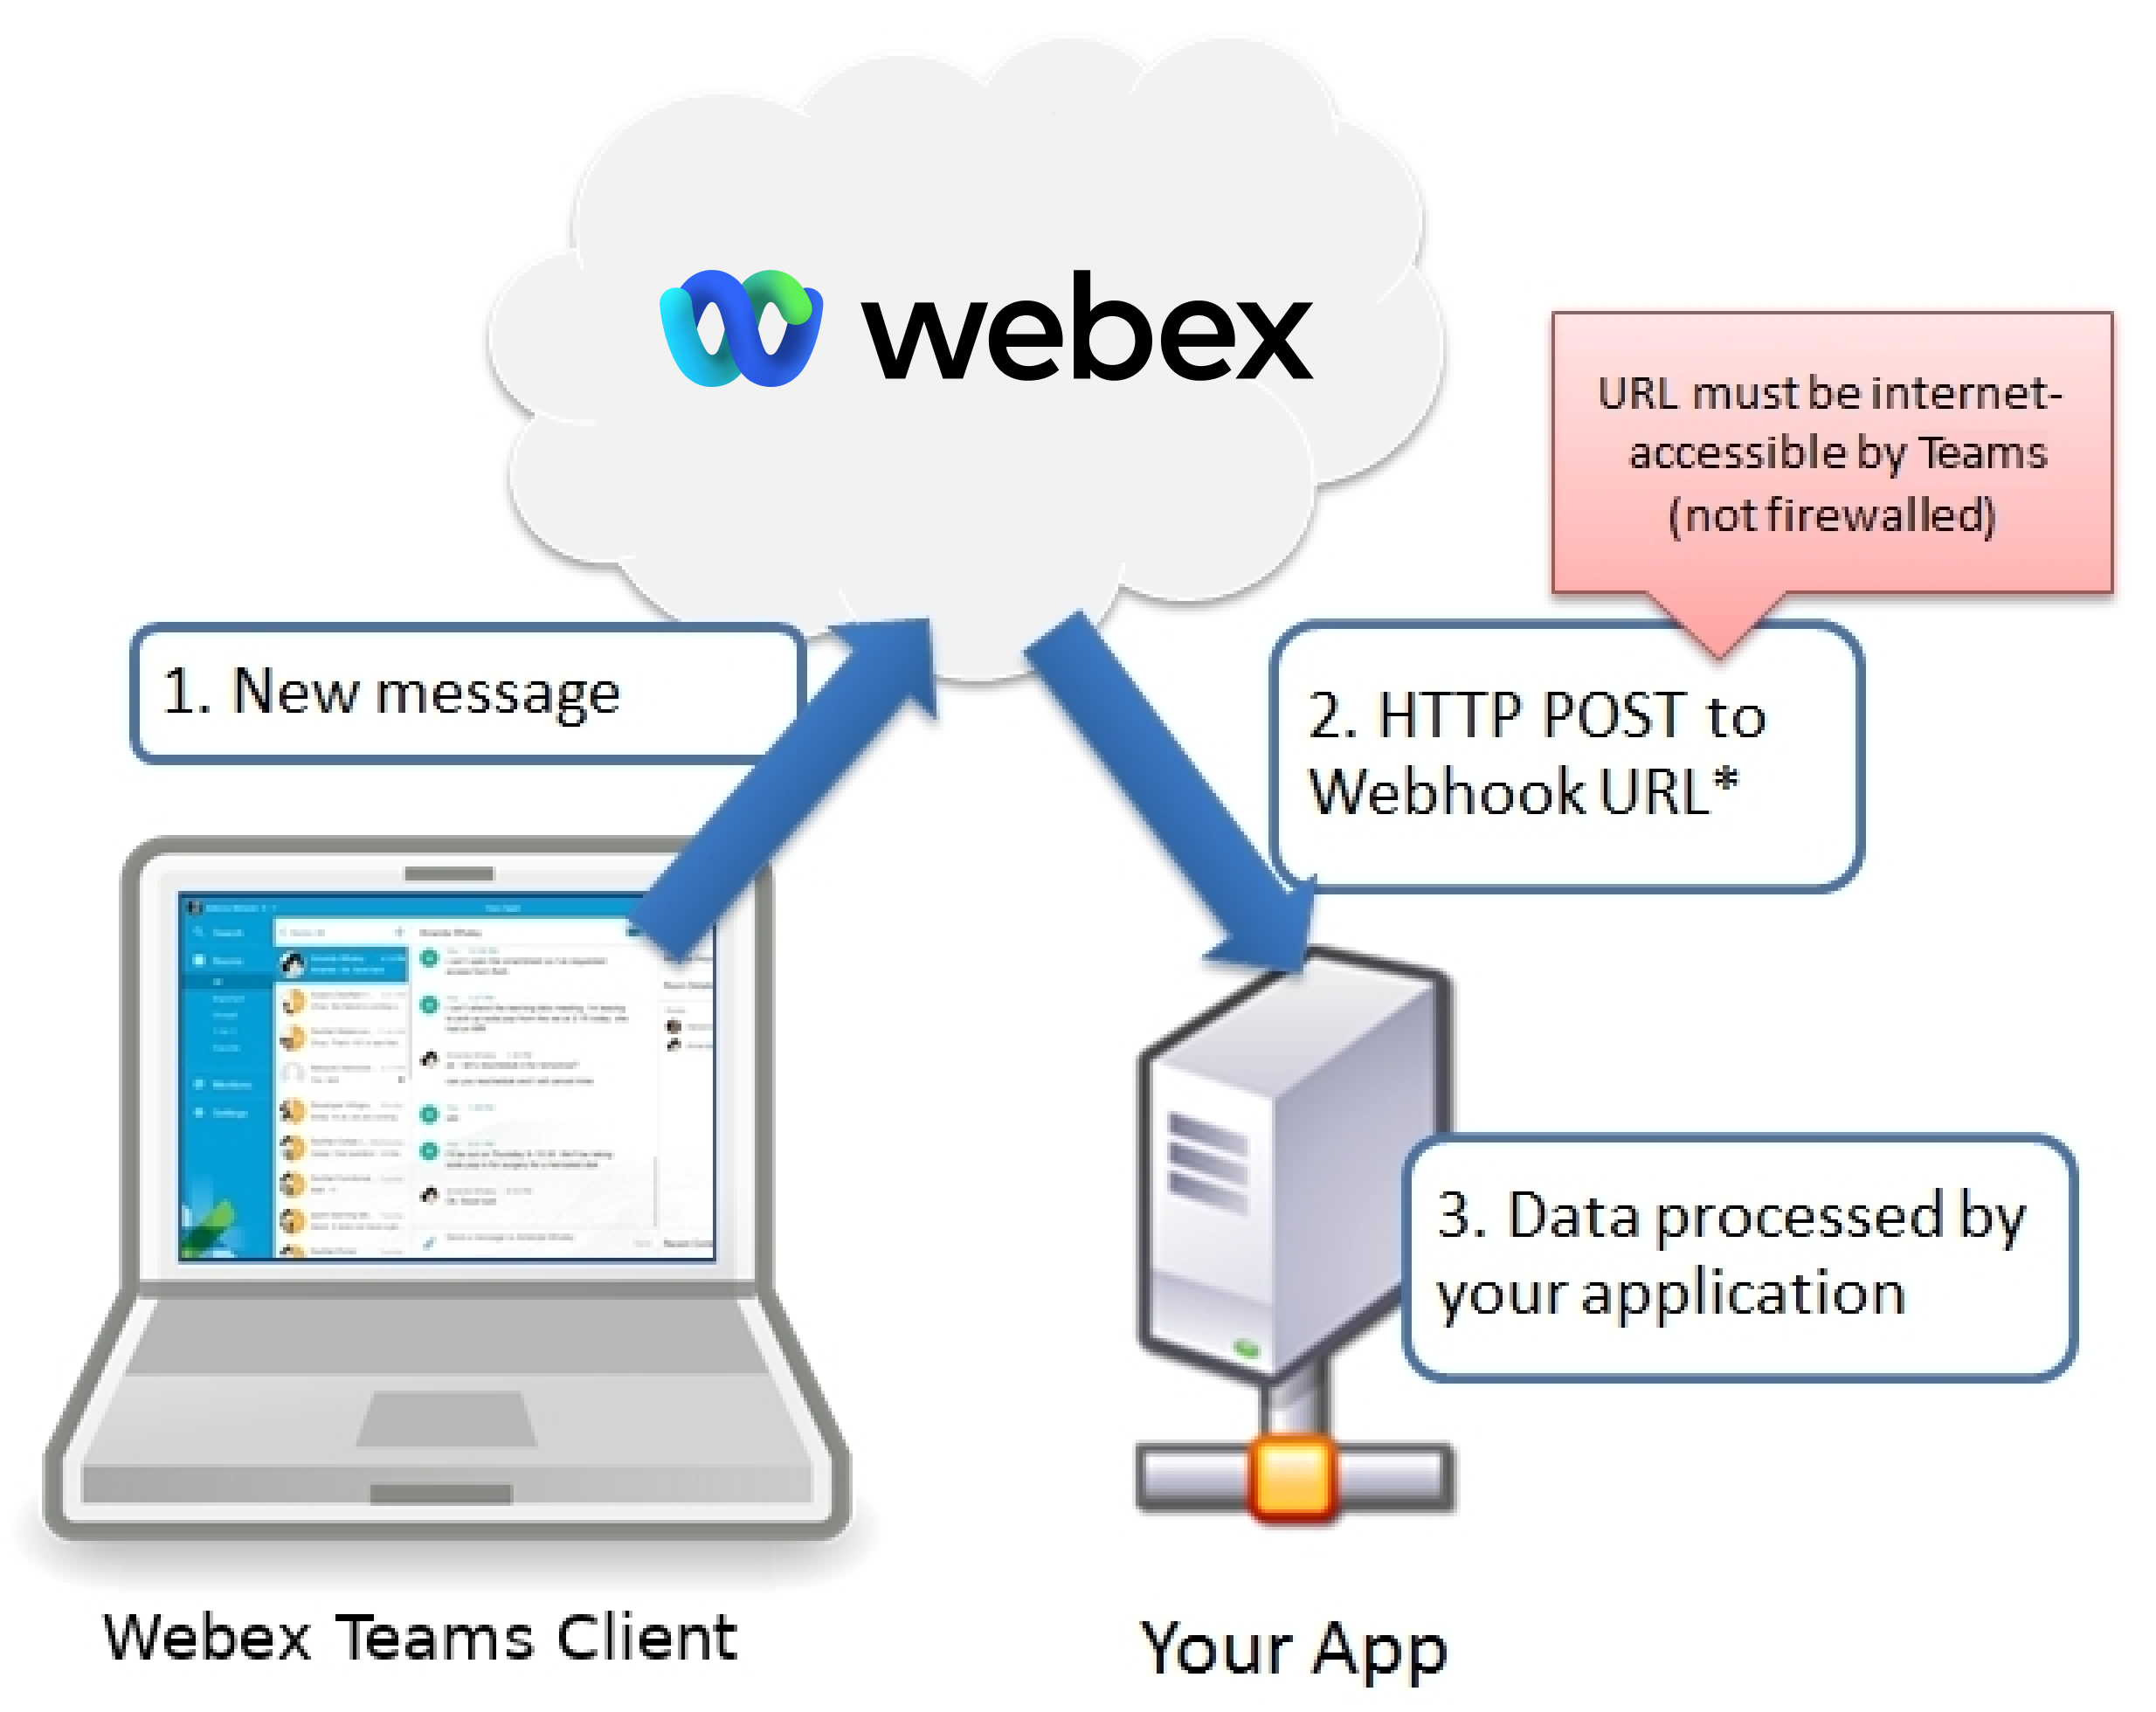
Webhooks require a publicly reachable URL, where you application will be listening for inbound HTTP requests.
To make learning about creating and using webhooks easier, you'll use ngrok, an HTTP tunneling tool, running on your local system as a quick and easy way to inspect the contents of webhook messages without having to create and deploy a new backend service.
Of course, in a production situation, you would set up the webhook so that Webex sends the notification to an actual running application that you have coded (ngrok's main function is actually to forward such requests to a web app running on a local PC). Today, we are just using ngrok by itself so that you can see how a webhook works without having to write an application first.
anchorPrerequisites
anchorTo complete this tutorial you'll need the following:
- A Webex account — If you don't have a Webex account go to https://cart.webex.com/sign-up and follow the instructions to create one.
- ngrok — A public HTTP proxy service and client: https://ngrok.com/.
anchorStep 1: Create a Space for Testing
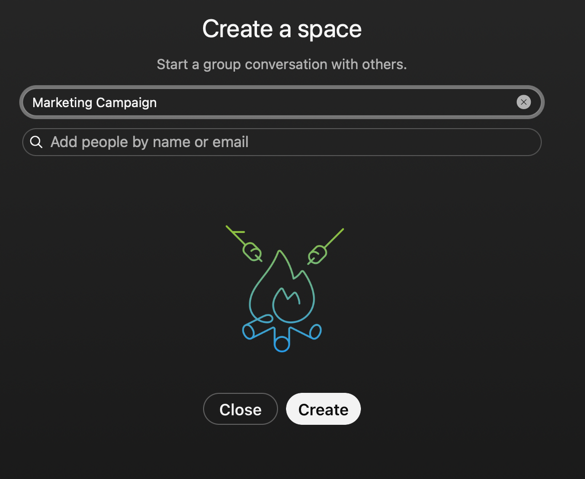
anchorFor the purpose of this tutorial we'll capture events fired every time new messages are created in a space called "Marketing Campaign". You'll use the Webex app to create the space.
Open the Webex desktop app and press Ctrl+Shift+N or Cmd+Shift+N to open the new space page.
Give the space a name like ""Marketing Campaign", then click Create.
anchorStep 2: Get the ID of the Space
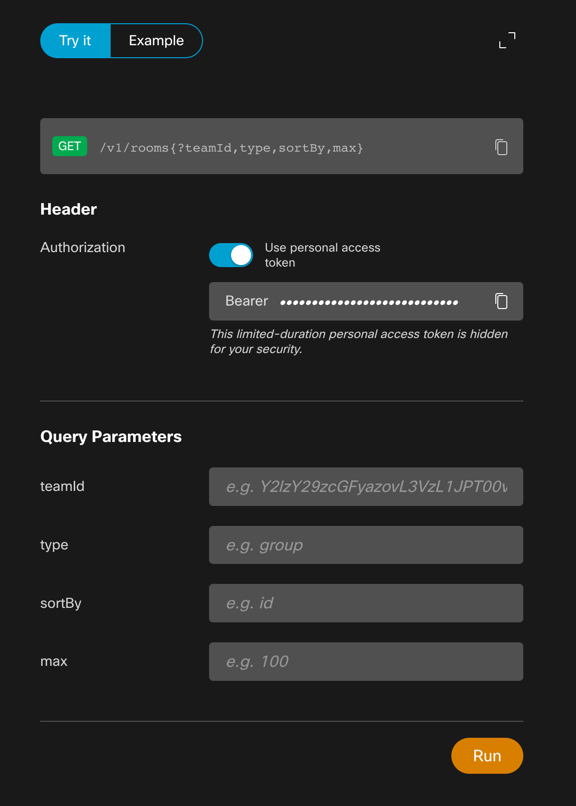
anchorAs most Webex users have many spaces, we will use the filter parameter in our webhook request to restrict webhook notifications only for message events from the "Marketing Campaign" space. To do this we first need to determine the unique identifier (id) of the space. We'll use the Try It feature in the Webex interactive API reference to retrieve the names and IDs of all of the spaces where your user is a member, using the /rooms resource.
To obtain the ID of the new space:
Sign in to the Developer Portal if you're not already signed in.
Open the List rooms API reference and make sure the Use Personal Access Token option is enabled.
Click Run.
Scroll down to view the results and locate the "Marketing Campaign" item in the JSON results.
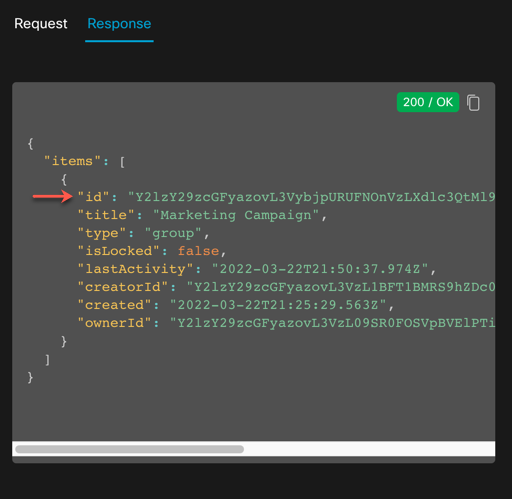
Copy the value of the
idfield to your clipboard.
anchorStep 3: Setup ngrok to capture web requests
anchorNext you'll download and start ngrok on your local system and obtain its public HTTPS URL. You'll provide this URL when you create the webhook that will listen for events.
To set up ngrok service and retrieve its unique URL:
- Download the ngrok client and unzip it. (It's not necessary to sign up to use ngrok.)
- Open a terminal window and navigate to the download directory.
- Launch
ngrokto listen for HTTP requests on port 5000:
Mac/Linux:
./ngrok http 5000Windows:
ngrok http 5000When ngrok starts up it will display some information about the service, including its public HTTPS URL:
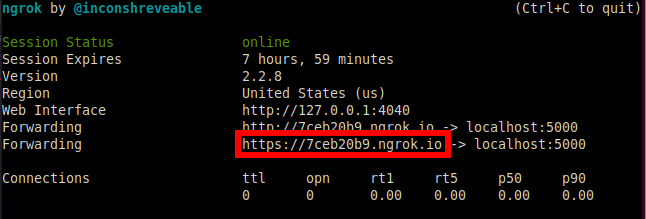
Copy and save this HTTPS URL for use in the next steps.
Open a web browser and browse to
http://localhost:4040to view the ngrok request inspector: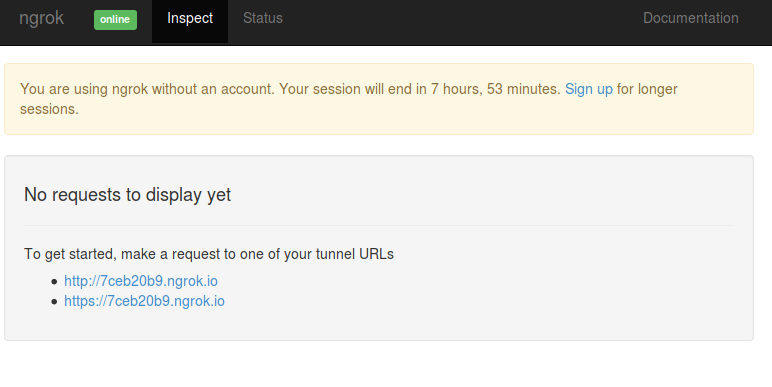
This is where you will observe JSON payloads for each webhook event later in the tutorial.
anchorStep 4: Register a new webhook
anchorTo begin receiving events you need to register a webhook with Webex. To do this you make an HTTP POST to the /webhooks resource URL, passing it information about the webhook, including the URL that should be notified when the event occurs. You also specify the type of API resource you want the webhook to monitor ('messages'), the kind of event ('created'), and a filter to limit events for the room ID you obtained in the previous step. For details about the types of resources, events, and filters available for webhooks, see the Filtering Webhooks.
To register a new webhook:
Open the Create a Webhook API reference and make sure the Use Personal Access Token option is enabled.
In the Body section of the request form, fill out the fields with the following information, replacing <ngrok-url> and <room-ID> with the ngrok URL and room ID obtained in steps 2 and 3.
Input field Value name Messages webhook targetURL <ngrok-url> resource messages event created filter roomId=<room-ID> Click Run to create the new webhook.
A successful HTTP response contains a JSON representation of the newly created webhook.
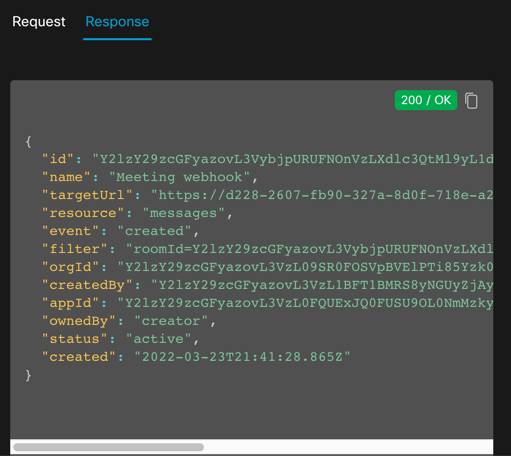
Next you'll observe JSON payloads being send to your ngrok endpoint when new messages are created in the Marketing Campaign space.
anchorStep 5: Observe the Webhook in Action
anchorLet's put it all together so we can see the webhook in action. Any new message that is added to the Marketing Campaign space will trigger the webhook, which will cause Webex to send a notification to the target ngrok URL. Each notification is a JSON object that includes the ID of the new message, and other information about what caused the notification. See Handling Requests from Webex for details about all the fields returned by the webhook.
To view webhook events:
Open the Webex app and post a message in the "Marketing Campaign" space.
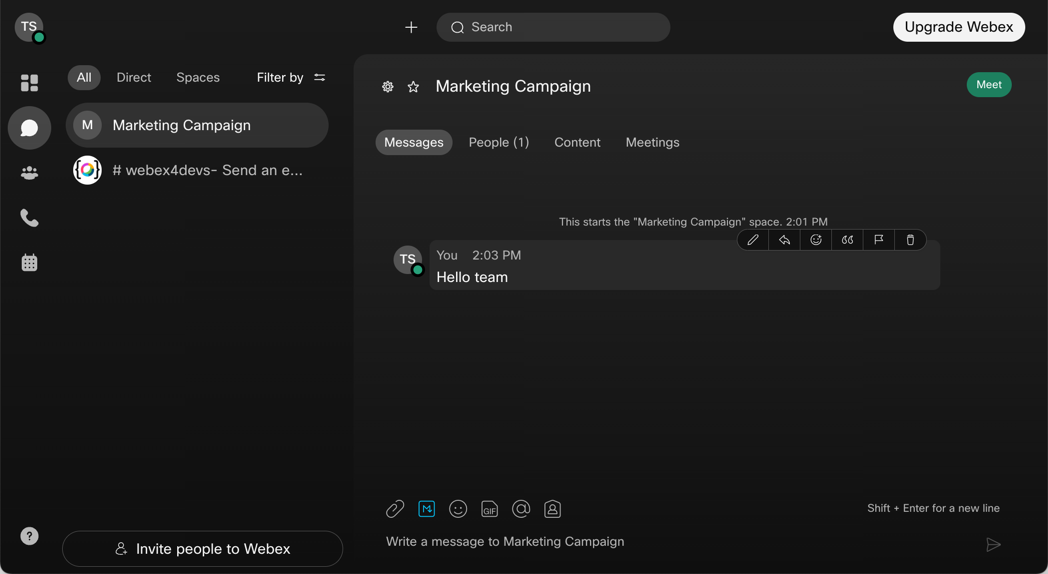
In your browser open the ngrok inspector URL at http://localhost:4040 to see the Webex webhook notification message details, which will look like the following:
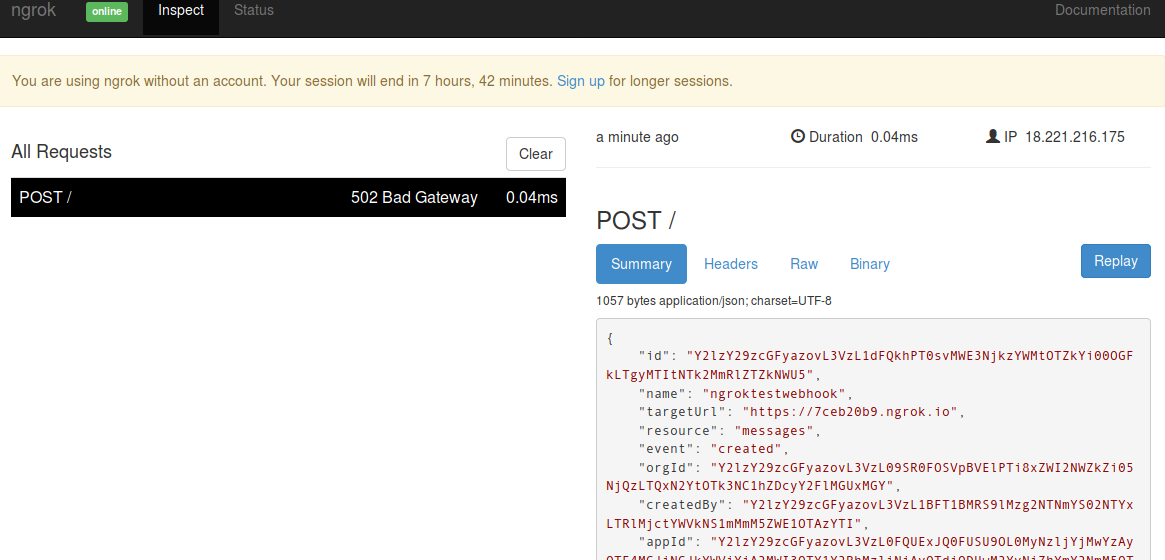
The
502 Bad Gatewaymessage is expected, as ngrok is not configured to point to an actual listening appHere's an example JSON body formatted for easier reading:
{
  "id":"Y2lzY29zcGFyazovL3VzL1dFQkhPT0svZjRlNjA1NjAtNjYwMi00ZmIwLWEyNWEtOTQ5ODgxNjA5NDk3",
  "name":"Guild Chat to http://requestb.in/1jw0w3x1",
  "resource":"messages",
  "event":"created",
  "filter":"roomId=Y2lzY29zcGFyazovL3VzL1JPT00vY2RlMWRkNDAtMmYwZC0xMWU1LWJhOWMtN2I2NTU2ZDIyMDdi",
  "orgId": "Y2lzY29zcGFyazovL3VzL09SR0FOSVpBVElPTi8xZWI2NWZkZi05NjQzLTQxN2YtOTk3NC1hZDcyY2FlMGUxMGY",
  "createdBy": "Y2lzY29zcGFyazovL3VzL1BFT1BMRS8xZjdkZTVjYi04NTYxLTQ2NzEtYmMwMy1iYzk3NDMxNDQ0MmQ",
  "appId": "Y2lzY29zcGFyazovL3VzL0FQUExJQ0FUSU9OL0MyNzljYjMwYzAyOTE4MGJiNGJkYWViYjA2MWI3OTY1Y2RhMzliNjAyOTdjODUwM2YyNjZhYmY2NmM5OTllYzFm",
  "ownedBy": "creator",
  "status": "active",
  "actorId": "Y2lzY29zcGFyazovL3VzL1BFT1BMRS8xZjdkZTVjYi04NTYxLTQ2NzEtYmMwMy1iYzk3NDMxNDQ0MmQ",
  "data":{
    "id":"Y2lzY29zcGFyazovL3VzL01FU1NBR0UvMzIzZWUyZjAtOWFhZC0xMWU1LTg1YmYtMWRhZjhkNDJlZjlj",
    "roomId":"Y2lzY29zcGFyazovL3VzL1JPT00vY2RlMWRkNDAtMmYwZC0xMWU1LWJhOWMtN2I2NTU2ZDIyMDdi",
    "personId":"Y2lzY29zcGFyazovL3VzL1BFT1BMRS9lM2EyNjA4OC1hNmRiLTQxZjgtOTliMC1hNTEyMzkyYzAwOTg",
    "personEmail":"person@example.com",
    "created":"2015-12-04T17:33:56.767Z"
  }
}
The JSON object's
datafield contains a JSON representation of the message resource that triggered the webhook, including the ID of the message, the room ID, as well as the ID and email of the person who sent the message. To get the actual message text, you make another request to theGET /messagesAPI, passing the ID of the message as parameter.Copy the value of the
dataobject'sidfield to your clipboard, which is the ID of the newly created message.
To get the message text:
To see the new message in our webhook request, we'll make a request to the Get Message Details API.
Open the Get Message Details API reference page.
Click on the
messageIdURL fragment and paste in the message ID you obtained in the previous steps.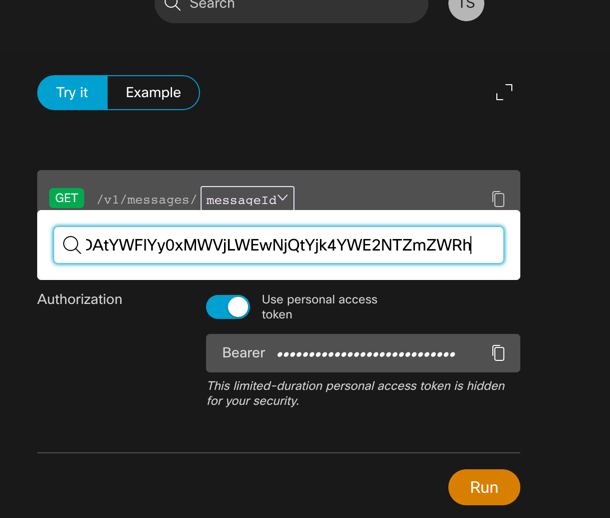
Click Run. The message details are displayed in the Results area.
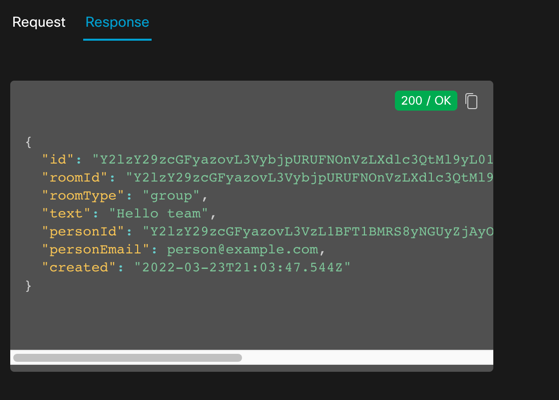
anchorGoing further
anchorTo learn more about the Webhooks API, check out Webhooks in the Webex documentation.
At the end of the day, webhooks are leverage by developers to create interactive chat bots. The labs below will drive you through the steps to build your first bots:
- Node.js tutorial: <a
href="https://developer.cisco.com/learning/modules/spark-apps" target="_blank">Creating Chatbots for Webex
- Python tutorial: <a
href="https://developer.cisco.com/learning/tracks/devnet-express-cloud-collab-it-pro/creating-spark-bots-itp/collab-spark-botl-itp/step/1" target="_blank">Run a Webex bot locally